LA – Focusing on Pioneering Designers

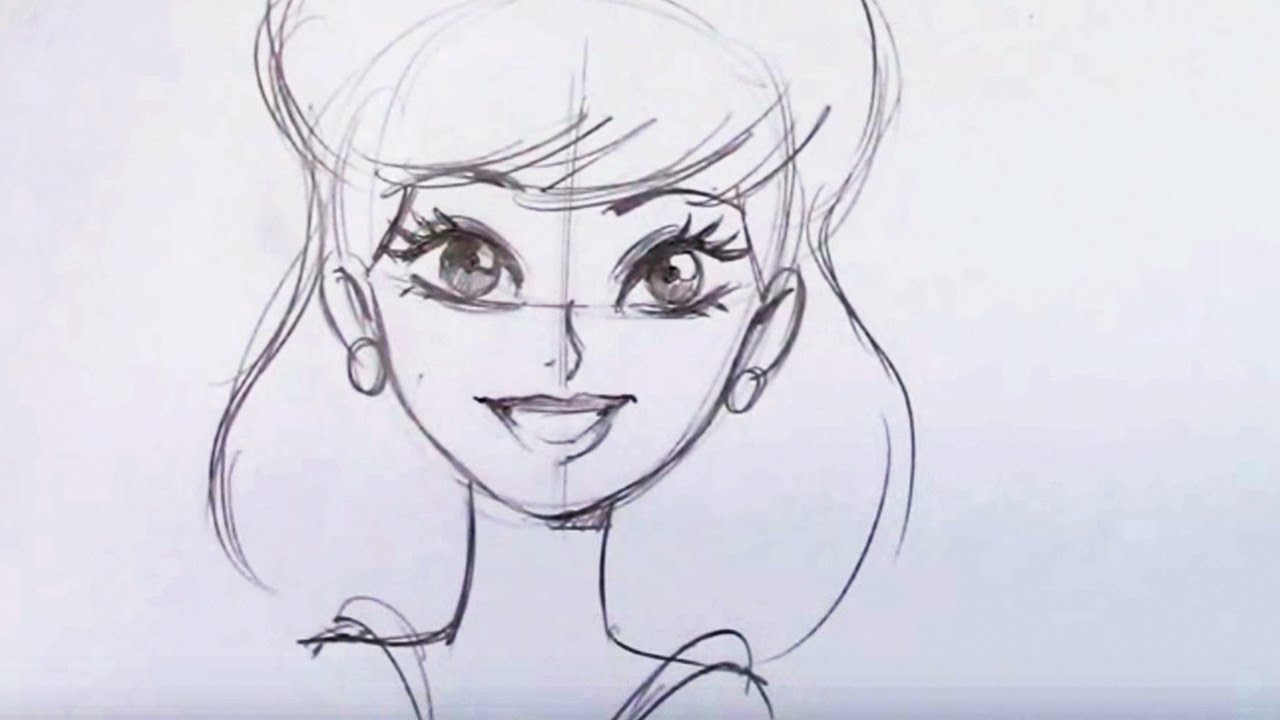
Within the broader milieu of Neo-modernism, we focus on Marian Bantjes, who set design trends with her unique application of typography, loose illustration and well-balanced compositions.
Watch the Interview with Marian Bantjes on Lynda and answer the following questions:

  • Objetive observation
    During the interview, Marian mentions, “When I worked at Digitopolis, I was working almost entirely on the computer, basically the computer and with photography. And now I am using a wide variety of materials, sometimes still involved with a computer and sometimes just with the materials themselves. But having a space like this allows me to obviously store them all, and to work on these various surfaces in different media.”
    What is your opinion on the use of the computer combined with different media? Write one page (350 words) on your opinion of the importance of media and design and what your take is on the use of computer technology.
  • Pushing technology and changing philosophy 
    While describing her development of style, Marian states,”I am not an expert on illuminated manuscripts by any stretch of the imagination, but there are a couple of purposes of it. But one of those purposes is definitely to invoke wonder in this way that was very interesting to me and was feeding directly into my ideas about that symbiotic relationship between graphics and text.”
    How do you think this links to the philosophy of the Swiss International School? How is it different? Has technology given us an advantage in expressing the symbiotic relationship between image and text? What about Marian’s work? Is this reflected in her work? Do a write-up (350 words) on the relationship between image and text, as seen in Marian’s work and relate this back to the Swiss International School. Substantiate your answers with relevant facts. You may use a visual example of both Marian’s work and that of the Swiss Interna
    tional School to facilitate your analysis.

Objective observation

I think that it is important to combine the use of computer and newer technology with the use of other more traditional means of media and material when working with design. I believe that knowing how to use new technology/digital media as well as more traditional means when doing various design work and trying to communicate a message is absolutely crucial to achieving quality and strength in your works. Your idea development and work process when trying to come up with a design should really only be limited by your own imagination, and not by a lack of technique, skill or understanding of how to use various media. When you are able to use the traditional media and materials, and combining it with computers and new technology, you have a greater understanding for what you really are doing (and why you are doing it), and you have a larger skillset and more tools that can help you further develop your ideas and designs to its full potential.

By sketching, working by hand, trying out different media and even materials, you explore and work on your ideas, consider and evaluate the various sides of it, and really develop the good ones and separate them from the ideas that won’t work out. It helps you really delve into the ideas you have and properly examine all it’s possibilities, figuring out what works and what doesn’t.

Some ideas really don’t work out the way we imagine them to, but sometimes, changing what media you are channeling your idea through can change the whole game. Knowing what kind of media to use can be tricky at times, and it is a skill that has to be learned. Nevertheless, there should always be room for experimenting and exploring other things and approaches to your idea than what you originally had in mind. It can help you develop your idea even further, or strengthen how you perceive the same idea in another media. Designers usually have their own individual preferences and methods of how to approach an idea they have and «give life to it», developing it and working on it until it is solid enough to base a design on. This is where it is key to combine the more traditional media, like sketching, illustrating, painting etc., for developing and exploring your idea by hand, figuring out what works and what doesn’t, and then using digital media to further develop your idea or design.

By the time you then start working digitally, you have pinpointed the strengths and weaknesses of your idea/design and you can further experiment with it, perfecting it, making it as good as possible.

Pushing technology and changing philosophy

In Marian’s work, you can clearly see that her personal style shines through, and her work is definitely more subjective compared to the objectiveness and personal detachment in work with the Swiss International Style. During the Swiss Design movement, the relationship between image and text was supposed to be very unbiased and the artists/designers wanted their work to be as impersonal as possible so they could get the message across quick and easy without any unnecessary elements or embellishments. In the Swiss International Style, the relationship between images and text is that the image describes the text, and the text describes the image.  One of the main goals of these designs was to get the message/content of the design to be quickly and easily read and understood by the viewer. The legibility of the designs was very important so that people could understand and comprehend what they were looking at as fast as possible.

The way the Swiss International Style is approaching design is pretty much the exact opposite of how Marian’s work can be perceived. She allows her work to be influenced and affected by her personal style and characteristics, and she has her very own way of designing. In her work, it is not always clear what the message really is at first, and her works often demand to be studied a bit longer and harder for the message to come across. Her text elements don’t necessarily describe the image and vice versa, because often in her designs, the text elements actually make out the image. She often hides words in very elaborate, decorative, and embellished swirls, lines, loops and flourishes in her designs, and it is not always clear what you are looking at. One thing she is particularly good at is making designs that (of course) looks very good already at the first glance, but as you study the work more and more, you notice things and details that strengthen the design even more. This gives her work a very comprehensive depth that you won’t find in the Swiss International Style.

https://i.pinimg.com/originals/4b/5e/e8/4b5ee8a3fb22eb9d7d7aa3b64ea537de.jpg

Here is an example of the Swiss International Style. Very few elements, sans-serif typeface, text elements describing the image/image supporting the type, objective, clear, highly legible with a very straight-forward communication of the message.

Bilderesultat for marian bantjes grape alphabet

https://tinakonradsen.wordpress.com/wp-content/uploads/2018/05/17b0d-6a00e54fcb68598834010536ecce1e970c-600wi.jpg

Here is an example of Marian’s work (one of my favorites from the Lynda video). When you first look at it, it looks like a cool pattern with some oval shapes of some sort. But when you look closer, you can actually see that the oval shapes are grapes. But it doesn’t stop there, because if you look even closer, you can actually see that each grape has its own letter – and then you realize that the arrangement of the grapes spells out actual names. A truly intricate, subjective, detailed design that needs to be studied a bit longer for its message to come across.


signature.png

LA – Research on Late Modernism

Consider what we have discussed regarding Late Modernism in the USA and The Swiss International Style. Do additional research on the Swiss International Style – it may be a good idea to study some of the known designers of this style and period. As a guide, visit designishistory.com, which gives a brief outline of specific designers and styles – take note that here the Swiss International Style is listed under 1940, which is not incorrect as the style was developed in the late 40s, but flourished in the 50s. Also use additional reference sources of your own and do a write-up of the following:

  • Research on the Swiss International Style
    After you have done research on the style, give a description of your own. How would you define the style? Do a write-up of about 350 words and discuss the characteristics of the style, the typefaces that were prominent and the philosophy behind it.
  • Influences on Swiss International Style
    Do a write-up of about 350 words on what you think the main influences were on the Swiss International Style. In other words, what motivated designers to create and follow this style? It may be useful to study specific designers, such as Josef Müller-Brockmann and Armin Hofmann, pay attention to what they themselves (or other designers amongst their peers) have said about the philosophy of the style.
  • Analysis of the Swiss International Style
    Read up on the different schools within the Swiss International Style: The Zurich School of Arts and Krafts and The Basel School of Design and do a write-up of the similarities between them and the differences in their approaches. This write-up should be your own conclusions, based on examples of work and stated facts and should be approximately 350 words long.


Here is a PDF with the answers (Images of the PDF below)

Sources

http://www.howdesign.com/featured/international-typographic-style-brief-history/

http://swissgraphicdesign.blogspot.no/2011/04/swiss-style.html

http://guity-novin.blogspot.no/2011/07/chapter-42-swiss-grade-style-and-dutch.html

http://www.historygraphicdesign.com/the-age-of-information/the-international-typographic-style/258-josef-mu-ller-brockmann

https://workingwithtype.wordpress.com/2014/02/17/grid-and-design-philosophy-by-josef-muller-brockmann/

https://www.noupe.com/design/josef-muller-brockmann-principal-of-the-swiss-school.html

http://www.designishistory.com/home/swiss/

http://www.designishistory.com/1940/joseph-mueller-brockmann/

http://www.designishistory.com/1940/emil-ruder/

http://www.historygraphicdesign.com/the-age-of-information/the-international-typographic-style/869-basel-school-of-design-allgemeine-gewerbeschule

http://www.thebaselschoolofdesign.ch/


signature.png

LA – Advertisement in After Effects

During this lesson I have touched on many things that should help you understand the possibilities of After Effects.

I would now like you to create your own Apple iPod advertisement.

  • It should be similar in style to the one shown at the beginning of this lesson.
  • Your ad should be cut to any music track of your choice.
  • It should be 30 seconds in length.
  • It must have an animated background.
  • It needs to use colour graded and keyed footage.


signature.png

LA – Creating an animation in After Effects

  • Work through my sunrise example step-by-step. Upload your version of this project to your WordPress blog. Please note, you will make a better impression if you make this animation your own. Don’t be scared to take things a little further and experiment.
  • Now you need to come up with a unique animation concept of your own. Create a storyboard for this concept. (Make sure that your idea is not too complicated, but don’t limit yourself by making it overly simple.) Scan your sketches in and upload it to your WordPress blog.
  • The next step is to create the file and folder structure. Please take a screenshot of your folder structure and hand it in along with your project.
  • Create your animation in After Effects. Upload your project file and your rendered animation to your WordPress blog.

Sunrise animation

Sky background image source

https://www.pexels.com/photo/nature-sky-sunny-clouds-125457/

Storyboard for my own animation

EPSON MFP image

My animation – Growing flower

Soil texture image source

https://i.pinimg.com/originals/d2/21/ab/d221ab08c160acc097be979dd110664a.jpg

Tutorial resources

https://www.youtube.com/watch?v=V2DS2bfxJ0M

https://medium.com/@MilesOfRoses/animate-a-plant-growing-with-after-effects-31572c1d4e70

The computer folder structure

Skjermbilde 2018-04-29 kl. 21.47.11

After Effects folder structure (project panel)

Skjermbilde 2018-04-29 kl. 21.49.15


signature.png

LA – Applying basic animation principles

I have really spent a lot of time sketching/drawing this week, and I have actually had a lot of fun. It is no secret that I am not particularly skilled at drawing, but I decided to really go for it for this learning activity, read some tutorials (these, specifically; https://design.tutsplus.com/articles/cartoon-fundamentals-the-secrets-in-drawing-animals–vector-17361, https://design.tutsplus.com/articles/cartoon-fundamentals-how-to-draw-a-cartoon-face-correctly–vector-15792?_ga=2.55345131.1578139971.1523961922-893049638.1497381209) on how to draw cartoon style, and I have looked at some illustrations online to see how I could draw the various expressions (https://i.pinimg.com/originals/42/eb/d2/42ebd2e354d28d4bc8ea35a771f125d3.pnghttps://i.ytimg.com/vi/0ximK0UaK80/maxresdefault.jpghttps://i.pinimg.com/originals/95/6c/5f/956c5f841843e17543923c329b9fdb55.jpg ). I wanted to draw a human character for this learning activity, so I found it very useful to look at some tutorials. It helped me being able to create this character, as I have very little experience with drawing like this. Drawing in cartoon style turned out to be really fun once I got the “hang” of it (it’s getting there, at least). I have used a light-up stencil board to get the various versions of the character to look as similar as possible (especially when it came to the lines/waves in the hair, the positioning of eyes/nose/mouth etc.).

LEARNING ACTIVITY – APPLYING BASIC ANIMATION PRINCIPLES

Create a character. This character can be a letter, a person, an animal or any type of illustration, use your imagination. This character will play the main role in your animation.

Take this character and draw it in five different exaggerated poses. In each of these poses the character has to express some kind of emotion (like love, anger, dislike, distaste, happiness and so on). Keep the animation principles in mind when you draw your character.

Please scan your drawings and upload it to your WordPress blog.

EPSON MFP image

EPSON MFP imageEPSON MFP imageEPSON MFP imageEPSON MFP image

signature.png

LA – Visualise your ideas

I would like you to create a mood board and storyboard using a word and its meaning as the concept.  For example, you could use the word “prop”. You could then use the “r” to prop up the “p” that keeps falling over. That’s just to give you an idea, be creative and use a word and concept of your own.

Please scan your mood board and storyboard and upload it to your WordPress blog.

MOODBOARD

moodboard_jpg

Moodboard in PDF format

Image sources

https://sarahanneloudinthomas.files.wordpress.com/2012/10/child-branch1.jpg

http://www.luvbat.com/uploads/funny_spider_monkey_hanging_on_tree_branch__4791276594.jpg

https://omegaanimalremoval.com/img/_667xAUTO_crop_center-center/opossum-removal-and-control-omega-animal-removal.jpg

https://www.publicdomainpictures.net/pictures/10000/velka/1-1238251512oylm.jpg

https://cdn.pixabay.com/photo/2010/12/13/10/01/branch-2133_640.jpg

STORYBOARD

hang-2The storyboard shows how the last letter of the word is hanging from the second last letter of the word, swinging back and forth.


signature.png

LA – Playing with Ideas

For this week I had to make a new title sequence (in the form of a sketches storyboard) for a movie I love. What movie to use was obvious to me quite fast, and I decided to do one of my definite all-time favorite movie – the musical Grease (1978). The learning activity for this week has been quite challenging, as it included relatively much sketching/drawing. I am still not comfortable with (or particularly good at) sketching and drawing, so I these drawings aren’t very detailed or accurate, but it is the best I could do at this time. I think that this learning activity has helped me a lot when it comes to the idea behind and how to think when making motion design. I have intended that each frame lasts for 4 seconds, and I have tried to express the vision and idea behind this new title sequence as best as I could through the illustrations in each thumbnail in the storyboard, as well as some accompanying text to explain the scene or what action is going on.

The title sequence in Grease is an animated/illustrated intro, but for the new title sequence, I wanted to have real-life pictures instead. I have incorporated the same names/credits in the new title sequence as found in the original. The flying car is a known element from the movie, so I wanted to make the entire title sequence revolve around it.

Learning activity – Playing with Ideas

If the idea is at the heart of everything, then I would like you to think of a movie that you love. Then look at its current title sequence and come up with a new one.

Sketch up the rough idea in the form of a storyboard. Your storyboard needs to be at 30 frames and should be for at least 1minute of motion design

Please scan and upload this activity to your WordPress blog.

ORIGINAL TITLE SEQUENCE

STORYBOARD FOR NEW TITLE SEQUENCE

EPSON MFP imageEPSON MFP imageEPSON MFP imageEPSON MFP imageEPSON MFP image


signature.png

LA – Workflow and Backup

  • Draw a diagram of your preferred workflow and explain why you take certain steps.

workflow_diagram

The sources for the icons in this diagram can be found at the bottom of this post.

  • Create a checklist for your workflow.
    • Plan the shoot (do research, come up with a concept, sketching/storyboard)
    • Do the photoshoot/take the photos
    • Upload the photos to the computer and import them in Adobe Lightroom
    • Go through all the photos and give them star-rating (From 1-5 stars, depending on the quality of the photo), delete the unwanted/useless ones
    • Do a backup of the remaining photos
    • Edit the photos in Lightroom, or export to Photoshop for more detailed editing
    • Export photos for web (JPEG) or print (TIFF/PDF) in two separate folders (inside the folder for the entire photoshoot)
    • Backup the edited/exported photos
  • Take a screenshot of your folder structure.

Skjermbilde 2018-04-04 kl. 15.17.30.png

Here is the folder structure for a photoshoot I did for a local clothing store. Usually, I just organize my own pictures by date (and then export the photos I am going to use to their respective folders within the GRA2 folders > either Mandatory Assignments or Weekly assignments), but when I do shoots for others I rename the folder so that I can find it easily in the Lightroom library. In this case, the store owner only needed the photos in JPEG format (hence only a web folder inside the shoot folder), as she only was going to use them online for social media. When I delivered the photos to her I used Adobe Creative Cloud (Creative Cloud Files). I created a shared online folder where she could see all the photos, and then download what she needed.

  • Explain why creating backups are so important.

Creating backups is important because you might not get the opportunity to shoot the same photos again (it may be a once in a lifetime happening/event like weddings, baptisms and so on), but it is also very time-consuming (and it can also turn out to be more expensive) if you have to do another shoot just because you lost the photos and didn’t have backups of them on an external hard drive.

Sources for workflow diagram

Camera: https://encrypted-tbn0.gstatic.com/images?q=tbn:ANd9GcTt3fNCHlZd-UBqfZlWKcH0N6be9a2hpmrXJqwI5R0xw-rZWIe1

Mac: https://brain-images-ssl.cdn.dixons.com/3/0/10165803/u_10165803.jpg

External Hard Drive: https://www.power.fi/images/products/7636490063435_Seagate_STEA2000400_1.jpg

Lightroom icon: http://vectors.pro/wp-content/uploads/2017/10/adobe-photoshop-lightroom-cc-vector-logo.png

Photoshop icon: https://tinakonradsen.wordpress.com/wp-content/uploads/2018/04/9b058-1519158333119.png

JPEG icon: http://iconbug.com/download/size/507/icon/5937/file-format-jpeg/

TIFF icon: https://cyberidesign.ir/wp-content/uploads/2016/07/74bab5e14c56383b8bfbdadb5c19e9a6.png

Printer: http://www.iconarchive.com/download/i80318/jonathan-rey/devices-printers/Printer-Epson-T40W.ico

Web: http://files.softicons.com/download/system-icons/crystal-project-icons-by-everaldo-coelho/png/256×256/actions/web.png

signature.png

LA – Planning a Fashion Shoot

This weeks lesson couldn’t come at a better time! Right before Christmas, I was thrown into a situation where I ended up being the photographer for a local clothing store, where we shot a bunch of different outfits for their Facebook page. Originally, I was only there to support my two sisters who were the models for the shoot, but once it became clear that the owner of the store that was planning on taking the pictures herself didn’t have any experience with the digital SLR camera she had borrowed for the occasion and didn’t really know anything about photography, I gladly stepped in and did the photographing part. She could then focus on dressing the models and making sure that everything looked right on them. I didn’t have any light sources other than the ones in the ceiling and walls of the store, so the pictures didn’t turn out as good as I would like. I therefore offered to come back with all equipment that I would need to do a more professional photoshoot giving higher quality pictures, and my sisters volunteered to model again. We have now been speaking about doing another shoot for some time, and it couldn’t coincide better with the lesson of this week, as the store owner had gotten a new delivery and wanted to do it this Saturday. She also had two more models to join in on the shoot so it would turn out to be a quite extensive shoot. So, we did the shoot on Saturday evening after the store and the shoot location closed for the day, and I have used the entire Sunday selecting and editing the pictures so that they can be sent to the store owner as soon as possible and I can post this.

For the learning activity of this week, I have therefore decided to do this shoot in place of the Snow-White themed shoot that is mentioned in question 2 and 3, and I have tried to cover everything I would if this was a paid job. I said yes to taking on this photoshoot because I feel like it is a great learning experience, and I have access to all the equipment I could need and my dad (Paul) that has a lot of experience with photography assists me and teaches me how to do things, let me try it on my own and helps me out when I need a bit of help, so I was really happy to do it. We have planned this photoshoot very well, and I have made the shotlist, timeline, and moodboards in cooperation with the store owner. I also made a storyboard with a few thumbnails showing how I imagined some of the shots. We knew that we had to be as efficient as possible for this shoot, so we did everything we could to prepare for everything as best as possible. The shoot went really smoothly, and we were able to do all the shots we planned on doing (and then some), so we were all satisfied with how it went.

This photoshoot was quite low-budget, and it had to be done in a relatively short amount of time. The location of the shoot is a café right next door to the store, and it had a lot of various sections of different chairs, sofas, tables, counters, and various walls that made great scenes for the shots. We were able to use a lot of fun props like books, coffee cups, glasses and so on that were in the café. The vision behind the shoot was to show the clothes in a casual, cozy, friendly and inviting environment, and make it look not so product-photo like (with white backgrounds only).

It was an incredibly fun experience to try working as a photographer, taking responsibility, try making the models and team understand my visions, ideas, and directions, and simply just working together with a team to make the results of this shoot as good as possible. We didn’t have a make-up artist or someone to fix the hairs of the models, but some of the models did their own make-up, and the store owner and I also stepped in and helped to do the make-up on the rest. We also styled the hair on all the models. We did have a stylist that put together and co-ordinated the outfits and made sure that all the models got dressed with the right outfits when they were supposed to, and she also helped with hairstyling. I had my dad help me with the photographic equipment, and he also gave me tips along the way and helped holding reflectors and such. It was so good to have someone experienced with me there, as I felt a bit insecure at times so I really appreciated the guidance he gave me. The store owner made sure that the hair and clothing looked good at all times when shooting, moved things around, helped direct the models and switched out props. My mom (Tone) also helped moving things around, getting different things, and helping out with the styling and dressing of the models. I was in charge of making sure that we were on schedule when it came to the timeline we had, I directed the models and made sure that they were standing in the right places and having the right body angles and poses, and managing the light sources and making sure that the shots came out good; no over- or underexposure, or shadows or light (especially wall and ceiling lamps) in unwanted places. I also made sure that there were usable pictures of all outfits and decided when we had enough shots of each outfit.

We all worked really hard on this shoot, we were a lot of people and it was a lot of fun. Because we had planned so much in advance, we were able to do quite the amount of outfits in a very small amount of time, and everything probably went as good as they could. We didn’t have any unwanted situations, we had a great time together, and I learned so much, so this really inspired me and made me really look forward to doing more shoots like this.

LA – Planning a Fashion Shoot

Question 1

  • In your own words, describe the procedure of planning a fashion shoot. You don’t need to go into too much detail, a short outline will do.
    • Decide on a theme/concept; the concept of the shoot will determine all choices including make-up, styling, and location. Always have the concept in mind through each stage of production.
    • Create moodboards; preferably make different moodboards for hair, make-up, clothing, locations and styling. The moodboards will help you maintain clarity on your own ideas, and visualize them for the client and the rest of the team (like the make-up artist and stylist) so that everybody is on the same page.
    • Create a storyboard; draw a few rough sketches showing the angle and the length that you will be shooting at, and it should also show the positioning of the subject matter and the positioning of the camera and lighting. The storyboard should be shared with the rest of the team so that you all are visualizing the same thing.
    • Go location scouting; if the shoot is not set in a studio, the location will have a big say in how the pictures turn out. When scouting for a location, take your camera and moodboard(s) with you. Take pictures of the area and find interesting lines and textures that will enhance your pictures. Remember to get required permission for shooting at various locations.
    • Make a shortlist; the shortlist includes information about what equipment to bring on the day of the shoot, where the location is and what time the shoot starts, who the team on set is and what shots to take.
    • Choosing a model; the model needs to be carefully selected to suit the brand and the concept. Working with a modeling agency is a good way to go.
    • Appoint a stylist; the stylist is in charge of costumes and props, and contribute greatly to the development of the idea so always meet the stylist beforehand.
    • Appoint a hair and make-up artist; the make-up artist and hair stylist should try to accomplish the look you are going for in the moodboard(s), but they are artists in their own right and giving them creative freedom will usually achieve the best results.
    • Preparations; make necessary bookings, get necessary permission, book the model, team (make-up artist, hair stylist, and assistant), make sure that there is food and water on set. On bigger shoots, you would normally hire a catering company, but on a small low-budget shoot, your assistant can buy some snacks. Music can help set the mood, so bring speakers and connect them to your computer.
    • Time schedule; work out a detailed time schedule of the shoot day and send it to the team a day or two in advance so that everybody can make necessary plans based on the planned schedule for the shoot day.
  • What are the stylist’s duties?
    • The stylist is responsible for the costumes and props but also contributes to the development of the idea. You should preferably meet up with the stylist beforehand, and the stylist will then source the latest fashions that are suitable for the brief. The stylist has to make sure that all the costumes arrive at the shoot on time, that everything fits and co-ordinate costume changes and make sure that the right accessories are used with the right clothing.
  • List your duties as the photographer 
    • Plan the photoshoot as listed above
    • Make sure that everybody sticks (as best as they can) to the time schedule, but also be able to make the best out of unexpected situations, be quick thinking and come up with solutions on the spot. Everyone must have a deadline as to when his or her task must be finished so that everything is carried out as efficiently as possible.
    • While taking the photos, I should look at the clothes, the location, the model and the lighting and make sure that everything is arranged as it should, and make necessary changes based on my liking, and where I want the shoot to go and how I want the pictures to look like. Make sure that I get the best result as possible and do not be afraid to experiment.
    • Directing the model so that he or she fits in with the brief and storyboard. I shouldn’t only get the best look or pose from the model, but also something unique to the concept at play. The model should be guided to explore feelings and emotions that are related to the brief. I should find out as much as possible about the model in as little time as possible so that I can work with this information and guide them to reach their potential in terms of acting and modeling.
    • I should keep the shoot progressing in an orderly manner, even though the set/scene may become crowded (apart from the creative team and crew) with the client popping by, or if the shoot is in a public place, members of the public may get into the area I am shooting in.
  • What equipment would you take along on the Alice in Wonderland shoot that was featured in this module?
    • Camera
    • Lenses (wide angle, macro, 50mm)
    • Tripod
    • 2-3 Monolights
    • Softboxes
    • Filters
    • Memory Cards
    • Extra batteries and battery charger
  • Find an editorial fashion spread in a fashion magazine. Explain what you think the concept was, what equipment they used and how the location affected the concept. Scan or photograph the shoot and hand it in along with your answer.

I think that the concept behind this fashion spread is love and romance, and how you are bound by it (hence the ropes around the models). The shots are done in a studio, and the backdrop is a wall of paper flowers. In one of the shots, there is also a heart-shaped wreath consisting of smaller hearts, and another shot has the word «love» in four individual gold letters and gold frames placed on the backdrop – and one of the letters under the arm of the model. Combined with the purple paper flower backdrop, these props really emphasize the romantic feeling of the shots. I think that the photographer has used one simple light source, with the light focused on the upper half of the models (head, shoulders, chest), placed a bit higher than the heads of the models in front of them, and tilted down a bit. I believe this because of the softness of the shadows, and the harshness of the shadows on the bottom half and the top part of the backdrop. I also think that they have used some kind of reflector on the sides of the models, to direct more of the light to the shoulders and face of the models.

Question 2

1. Watch the tutorial on Lynda.com: Douglas Kirkland on Photography: Editorial Assignment

Plan a Snow White themed fashion shoot.

Create a mood board for hair, make-up and fashion.

Create a storyboard

Create a shot list

Create a timeline for the shoot day

Moodboards (PDF) Sources for the images in the moodbards in the end of this post.

Shotlist & Timeline (PDF)

Storyboard (PDF)

Question 3

If you have the resources, find a friend or family member who will fit the theme and a friend who is willing to do the model’s make-up and hair. Scout out a location and execute your shoot. It doesn’t have to be as detailed as we discussed above, it is just a way for you to get a feel of what a fashion shoot will be like. Publish your pictures with your assignment.

Moodboard image sources

MAKEUP-COLLAGE

https://s-media-cache-ak0.pinimg.com/originals/5c/0b/d7/5c0bd7c24a9c7cb3b41e6bf5a79fa6e4.jpg

https://caitlynmichelle.files.wordpress.com/2015/05/76ac3f069006e463a6f7d927936a67ed.jpg

https://s-media-cache-ak0.pinimg.com/originals/98/b9/11/98b911a2a978b6da68323ec8b1ec3e56.jpg

http://s4.weddbook.com/t4/2/5/3/2532526/wedding-inspiration-top-bridal-makeup-looks.jpg

https://i.pinimg.com/736x/63/8f/30/638f30350b612990b1129f91f85a1437.jpg

http://www.stylemagazin.hu/static/medias/112749/900×5630/_032b2cc936860b03048302d991c3498f.jpg

HAIR-COLLAGE

https://s-media-cache-ak0.pinimg.com/originals/3b/12/e1/3b12e1382e49066211a0e89ee27700dd.jpg

http://www.theteacherdiva.com/wp-content/media/loose-curls-tutorial1.jpg

https://therighthairstyles.com/wp-content/uploads/2014/05/1-medium-wavy-hairstyle-for-thick-hair.jpg

https://i2.wp.com/therighthairstyles.com/wp-content/uploads/2013/12/6-brown-wavy-hair-with-black-roots.jpg?resize=750%2C815&ssl=1

https://i.pinimg.com/736x/84/7e/fa/847efaf13f38a5591b773f85f4012462–long-layered-haircuts-layered-hairstyles.jpg

https://www.aliwigs.com/media/catalog/product/cache/1/image/650x/d313aec5724400d334b8605574f1f0ad/s/e/sexy-knock-out-long-wavy-lace-front-human-hair-wig.jpg

FASHION-COLLAGE

https://s-media-cache-ak0.pinimg.com/originals/7e/4c/5d/7e4c5dc65ad6b70ebeb3ad7e0df3aaed.jpg

http://g03.a.alicdn.com/kf/HTB1fj87IFXXXXcaXXXXq6xXFXXXs/2015-autumn-spring-new-Red-and-black-European-Jacquard-dress-Brand-Luxury-dress-Runway-Retro-Dress.jpg

https://xo.lulus.com/images/product/xlarge/2172152_401282.jpg

http://i1.adis.ws/i/boohooamplience/agg94719_mustard_xl?$product_page_main_magic_zoom$

http://picture-cdn.wheretoget.it/dybrg9-l-610×610-dress-maxi-color+block+dress-jewels-pink-blue-pink+dress-blue+dress-summer-cute+dress-cute-summer+dress–bottoms-tank-shirt-skirt-cotton-flowy-loose+fit-light+blue+tank-red+skirt-t.jpg


signature.png

LA – Preparing for brand development

1. Refer to the Brand Brief Schematic on p.121 and write, in detail, the following about your client from Assignment 1:

  1. Attributes
  2. Vision and mission
  3. Key products or services – list these in detail
  4. Key competitors – list three
  5. Competitive advantage
  6. Key stakeholders
  7. Value proposition
  8. Target market

2. Gather your findings and analyze the one or two interviews you’ve done. Then type up your findings and create your own brief. Your brief should include any insight you may have gained from these interviews. The purpose of the brief is to create a brand. This step of the assignment is the creation of a brief only – you do not have to develop the brand yet.

I decided to do an in-depth interview for this learning activity since I felt that I didn’t have enough to write a brief from if I only had the first interview to base it on.

Here is a PDF-file with the in-depth interview and the brief.


signature.png